In regular Java, you could print things to the console like this:
System.out.println("Hello World!");
In Android, you use the Log method instead:
Log.i("testing", "Hello World!");
This will print a message to your Logcat.
Your Logcat takes the place of a terminal or console in Android Studio.
When you first type in a Log.i() method, it will be red and say “cannot resolve symbol.”
Put your cursor on Log, Hit Alt-Enter, and select “Import Class.”
The “i” in “Log.i” stands for “information.”
Log.i() takes two String arguments.
The first argument is the “tag,” or category name, which you choose. The second argument is the message. Both of these Strings show up in your Logcat.
TAG variable
It is convenient to create a TAG variable in your class and then use that as the Tag in your Log.i() commands.
Example:
public class MainActivity extends AppCompatActivity {
    String TAG = "DebugMain";
    @Override
    protected void onCreate(Bundle savedInstanceState) {
        super.onCreate(savedInstanceState);
        setContentView(R.layout.activity_main);

        Log.i(TAG, "Hello World!");
    }
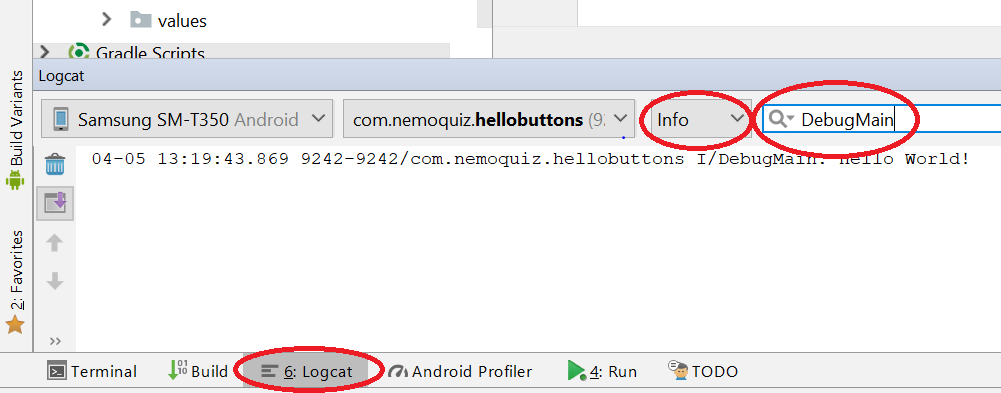
I’ve created a TAG string of “DebugMain” in the class. Below you will see that “DebugMain” will appear with this printed Log.
To see this log, run your program on the tablet.
Logcat will probably appear, but if it doesn’t you can click it on the bottom of the screen.
Keyboard shortcut: hit “Alt-6” to hide and show the Logcat.
(LogCat is called “Android Monitor” in Android Studio V2)
You should select the “Info” category to avoid getting way too many messages (see picture above).
You can search for your TAG string to see only comments pertaining to that TAG – see where I searched for “DebugMain” in the picture above.
“Verbose” will give you lots of Android system information that you don’t care about.
Choose Log.e (“errors”) if you want your log message to show up in red, making it easier to pick out in the Logcat.