Here are instructions for getting a project started for our school in Fall 2019.
Before you can create a project, install and update Android Studio with appropriate SDK and Android Platform version.
(Most of our tablets are 7.1.1, except the four older ones which are 5.1.1)
Creating a Project
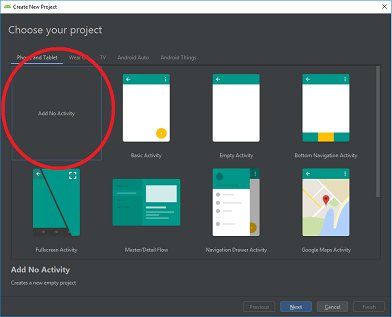
From the splash (menu) screen, “Start New Android Project.”
Select “Add No Activity” and click Next:
(Stay on the Phone and Tablet tab)
On the “Configure Your Project” screen, give it a name and pay attention to the folder where it will be located.
(Save it on the computer’s hard drive (C:), not on the One Drive (O:). One Drive is a great place to back up your Android Projects, but working from that cloud location will slow things down and cause you grief.)
Choose an appropriate minimum Android version.
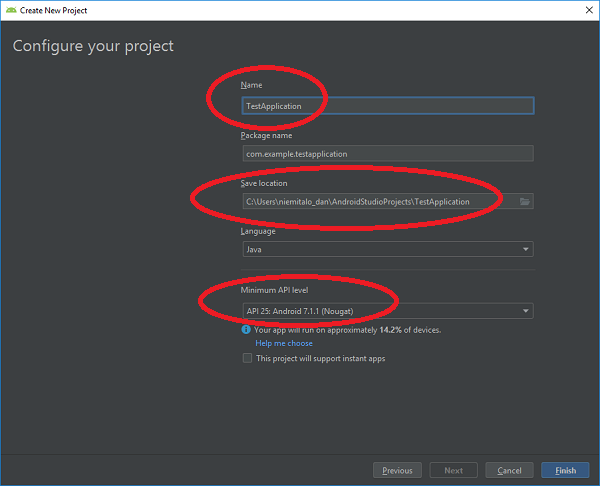
Click Finish.
Edit Gradle Files
We need to change some settings to prevent issues with our district’s web filter. This will allow Android Studio to download files it needs.
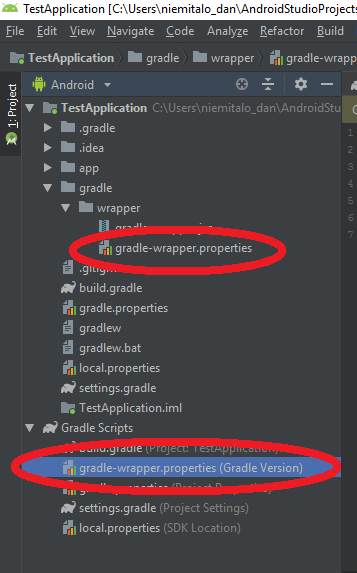
Find and open the project level Build.Gradle file in the project file browser:

It should start out with a sections like this:
buildscript {
    repositories {
        google()
        jcenter()
    }
allprojects {
    repositories {
        google()
        jcenter()
    }
}
Change the jcenter() lines (both of them) to this instead:
maven { url "http://jcenter.bintray.com"}
Now the sections look like this:
buildscript {
    repositories {
        google()
        maven { url "http://jcenter.bintray.com"}
    }
}
allprojects {
    repositories {
        google()
        maven { url "http://jcenter.bintray.com"}
    }
}
Next open the gradle-wrapper.properties file:
Change https to http in that file (delete the “s”).
Fine this:
distributionUrl=https\://services.gradle.org/distributions/gradle-4.10.1-all.zip
Make it look like this:
distributionUrl=http\://services.gradle.org/distributions/gradle-4.10.1-all.zip
Now from File menu, choose “Invalidate Caches and Restart:”

When it restarts, click the Build button, or go to the Run menu and click Build.
- The first time you do a build, it make take a while since the Gradle plugin might need to download and update.
- If you already have Project Structure available in your file menu, this step is unnecessary.
![]()
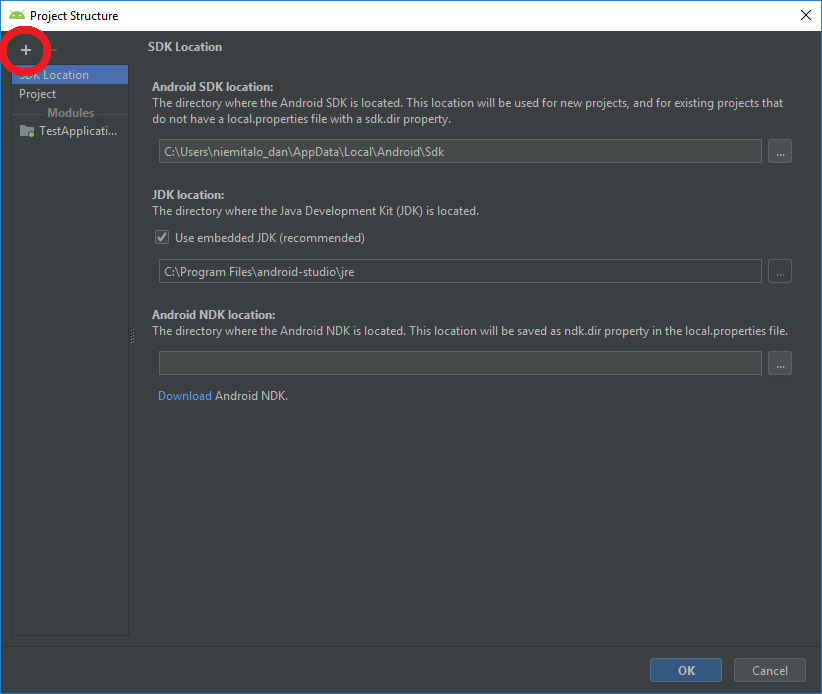
Now you can go to Project Structure in the File Menu.
(Or hit Control-Alt-Shift-S)
Hit the “+” at the top to add a module.
Now select Phone/Tablet Module and hit Next:
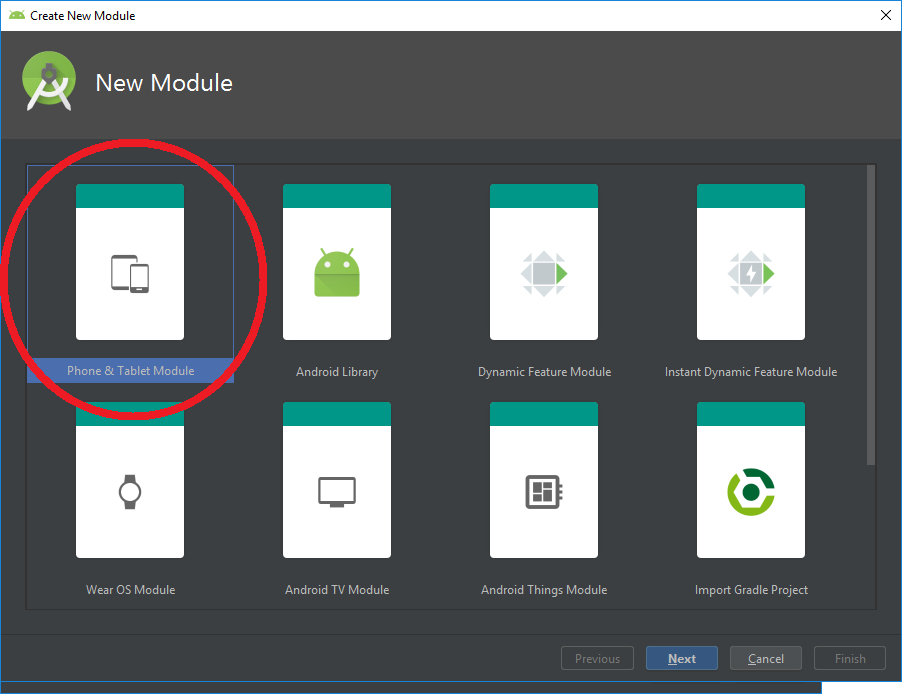
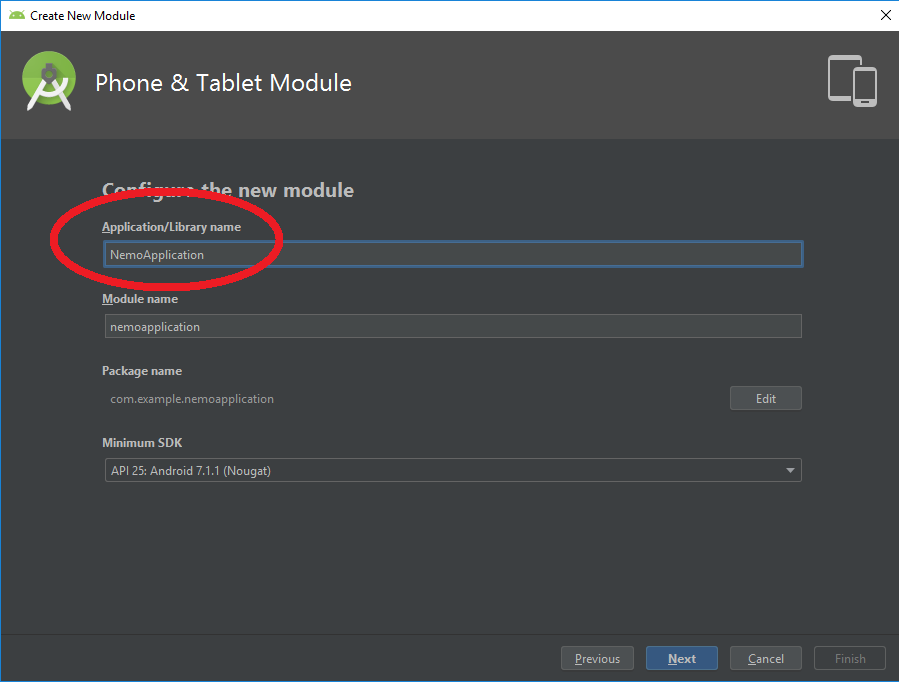
Give the module a name:
For a simple Hello World activity, choose “Empty Activity.”
![]()
Give the activity a name. This will be the name of a Java Class in your code. The “Generate Layout File” box will be checked, and you want to leave that checked. Let it auto-name your layout file.
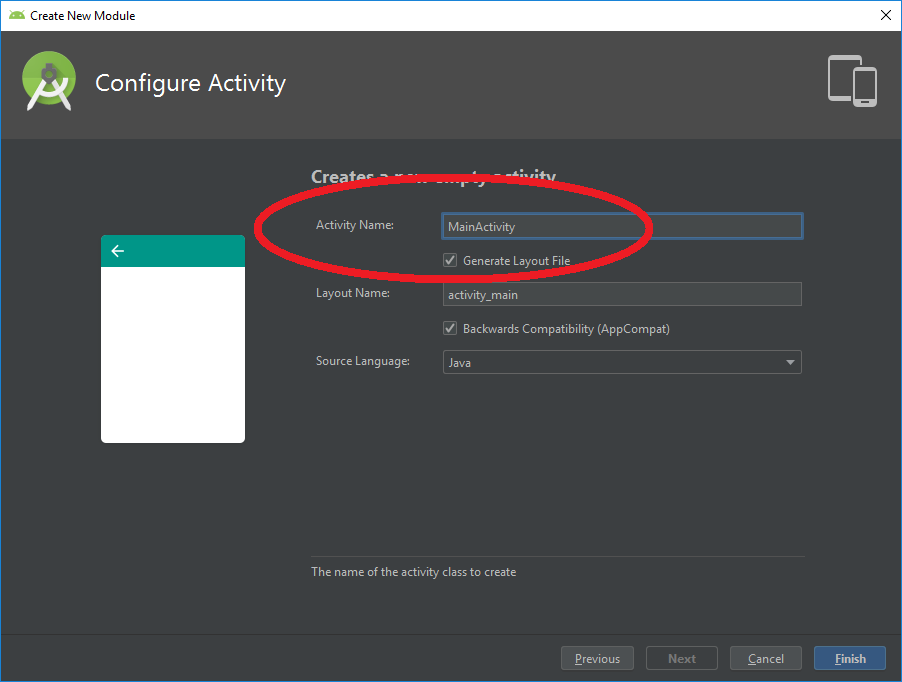
Click Finish.
If you’re lucky, you just click through the Configure SDK screen. If not, either figure out where you installed the SDK’s earlier or get some assistance:

Now, if things went well, you will have a run button:
(previously it was grayed out)
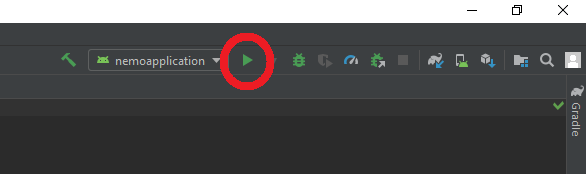
If that button works, click it. You get a screen like this:
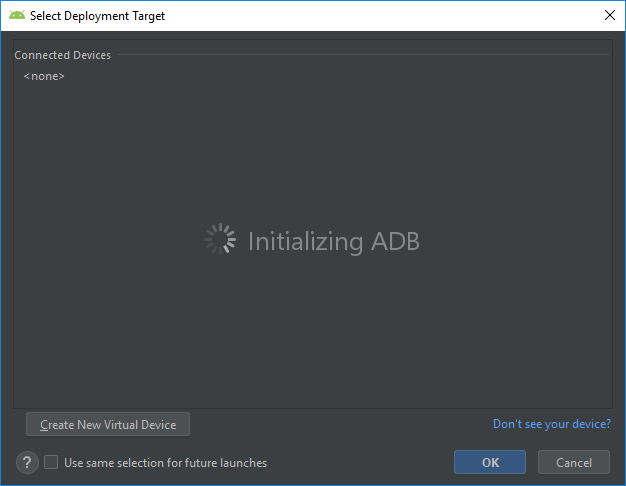
At this point, you need to have an Android Device with Developer Options enabled.
(How to enable Developer Options)
Now plug in your Android device and it shows up as a bunch of random characters.
Look at the Phone or Tablet screen and tell it to allow the computer to access it. Also, check the box that says to always allow that computer to make it easier next time.
At this point you can hopefully run your Hello World app.
If you install on your own computer:
This process is easier if you can just install Android Studio, update SDK’s and so on, and then create a new project with an activity. The extra steps are here because of issues that happen as a result of the network preventing connections to outside files that are needed during updates. Sorry for the extra hassle, but hopefully things work mostly normally from this point on!